The Good
Our good visualization can be found here:
http://www.mint.com/blog/wp-content/uploads/2009/11/MINT-TAXES-R4.png
Data/Mapping/Encoding
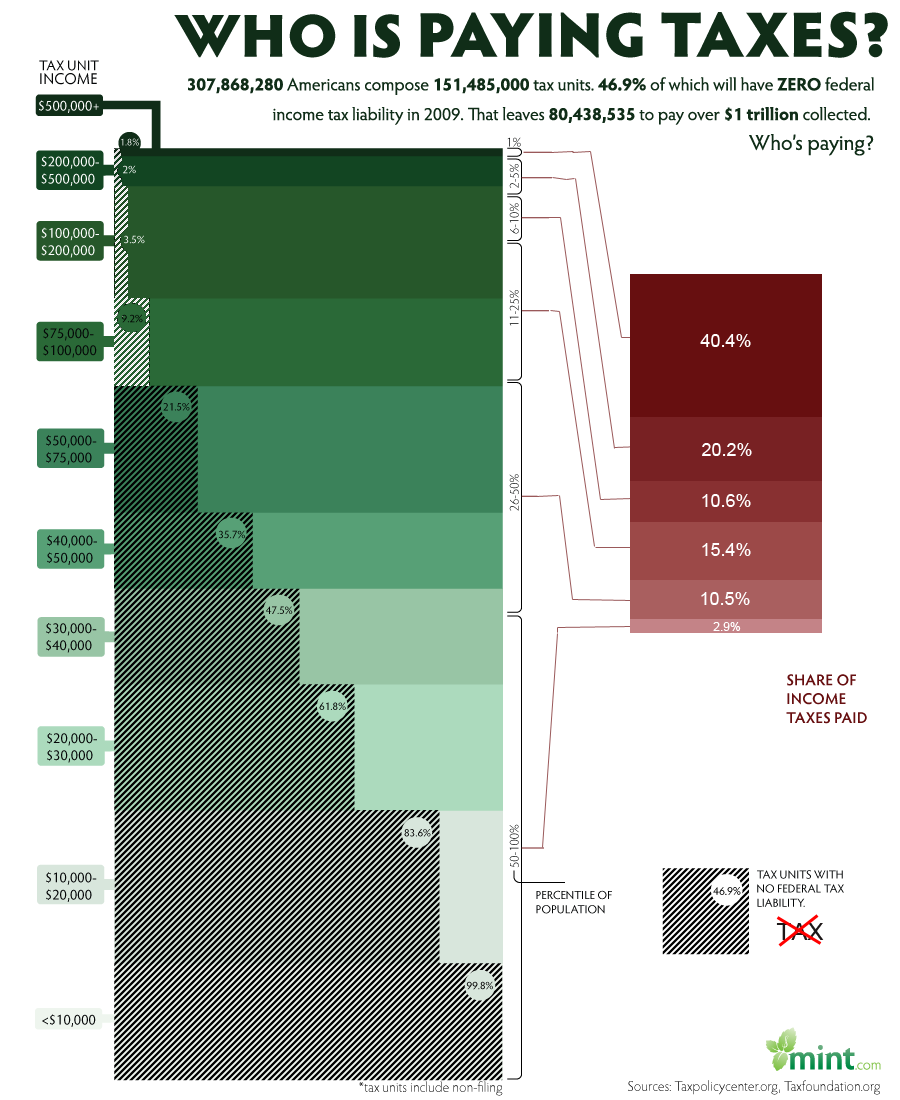
There are a large amount of data in this chart including percent taxable income, relative tax bracket size, and amount of total income tax paid. The chart also links each tax bracket with the total income tax paid. Each tax bracket is quantified as a percentage of the total population and encoded using the position in the chart, the height of the tax bracket block, and a shade of green. Higher tax brackets are higher on the chart and thinner because they represent less of the population and are shaded darker. Percent taxable income is shown by the percentage of the tax bracket that is shaded with hash marks. These are always black and show the actual value. The percent of total income tax paid by each bracket is shown in a pie chart using area/angle to split the total area. Each percentage is shaded a darker shade of red as the tax bracket increases. Connections between the tax bracket and total income tax paid are made using non-intersecting lines from the table to the pie chart.
For the most part, these are all good choices based on perception principles. The tax brackets are ordered data encoded with position from the bottom in the left chart. The relative size of each bracket is encoded using the height (length) of the block in the table. The hash shading used to show percent taxable income is encoded as length along the horizontal which gives the viewer a good idea of the relative amounts that each bracket is taxed. The pie chart is similar to the chart except that it uses area/angle, which are still good for quantitative data.
Here is the updated visualization:
New Mapping
It was difficult to develop a better visualization however there were a few things that we wanted to fix. First, we felt that the pie chart added just a little to much clutter to the image. We determined that encoding the percent income tax paid using length instead of angle would be more consistent with the chart to the left. This also removes clutter due to the connections made from the left table to the right table.
The second fix was to the color of the hash marks used in the upper tax brackets. We observed that as the green became darker, the hash marks were less visible. Our solution was to make the has marks white at the top of the chart. This makes it much easier to compare upper values with lower values.
The final fix was to place a glyph next to the hash mark key. While there is a note that explains what the has marks mean, on a quick viewing, the viewer might mistake the shaded region as taxable income instead of non-taxable income. This was a mistake that I made on my first review. Our glyph is the word tax with a red cross through it. This should make clear to any viewer that the shaded regions are not taxable.
Did we make things better?
This was a good visualization to begin with. We do believe that we where able to improve on it in minor ways. We believe that switching from angle to length for the pie chart was very important to helping the viewer connect the two charts. We also believe that changing the shading to a lighter color at the top of the left table was the only way to make the upper brackets readable.
The Bad
Our bad visualization can be found here:
http://emerge.softwarestudies.com/projects/ArtDiaspora.viz/kwangju-1degree-2.png
Data/Mapping/Encoding
The data in this visualization consists of seven categories and associations between each. The categories are, Artist, Work, Form, Place of Creation, Date of Work, Place of Birth, and Date of Birth. The associations are Artist to Work, Artist to Place of Birth and Date of Birth, and Work to form, Place of Creation, and Date of work. Each category is mapped to a list and encoded using color and angle around a circle. Each item in each category is also encoded using position in a list under the category and the categories color. Each item also has a small image but that helps very little. Associations are mapped to connections which are encoded as colored lines connecting two items on the perimiter of the circle.
This visualization was made as a show piece and may have been much more readable at a larger scale, however, on a computer screen it is simply impossible to trace any of the connections due to the large number of intersections. As an aside, the creator made the mistake of connecting the title category to every item under that category, this single attribute causes a majority of the clutter.
The main issue is that the visualization does not show the diaspora process of artists creating their work in different countries.
Here is our first attempt at a new visualization:

New Mapping
The first problem is to demonstrate the process of diaspora which is the process of artists moving from their native country and working in a different country. Our sub goal is also to show all of the different association between the artists and their work.
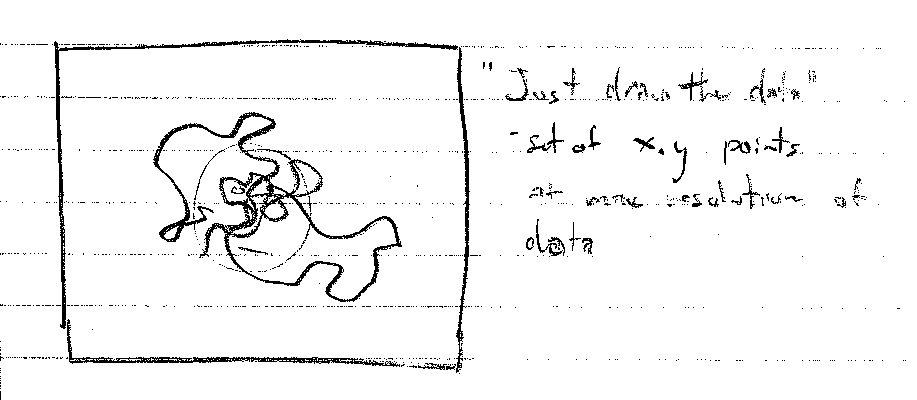
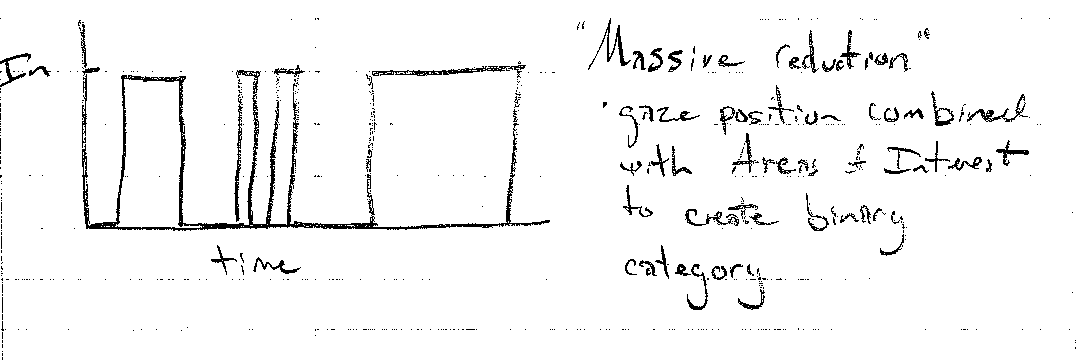
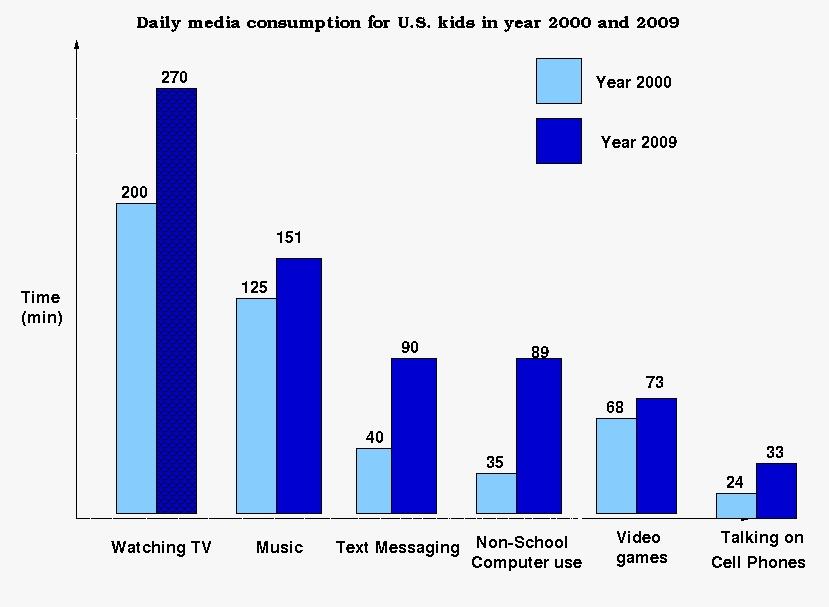
For the first attempt, we mapped the percentage of artists working in other countries to a number (y axis) and encoded it as a percentage of a bar at a given time. We mapped time to a number (x axis) and we show the percentages ate each time using the length of a bar and color to differentiate artists performing work in their home country from other countries. Two charts are created to show both the date of creation of the painting and the date of birth of the artist. This will help to identify generational trends.
In order to keep as many of the associations as possible, we include other data as comments in each bar. Each comment pertains to the year that it occurs on and helps to show the data that was presented in the original chart.
This was created using a smaller, fabricated data set and was produced using Illustrator.
Did we make things better?
We believe that we did make things better. The process of diaspora can clearly be seen by the rising percentages over time signifying that artists are leaving their country. Associations are slightly harder to trace, however they were impossible to trace in the original so this is an improvement.
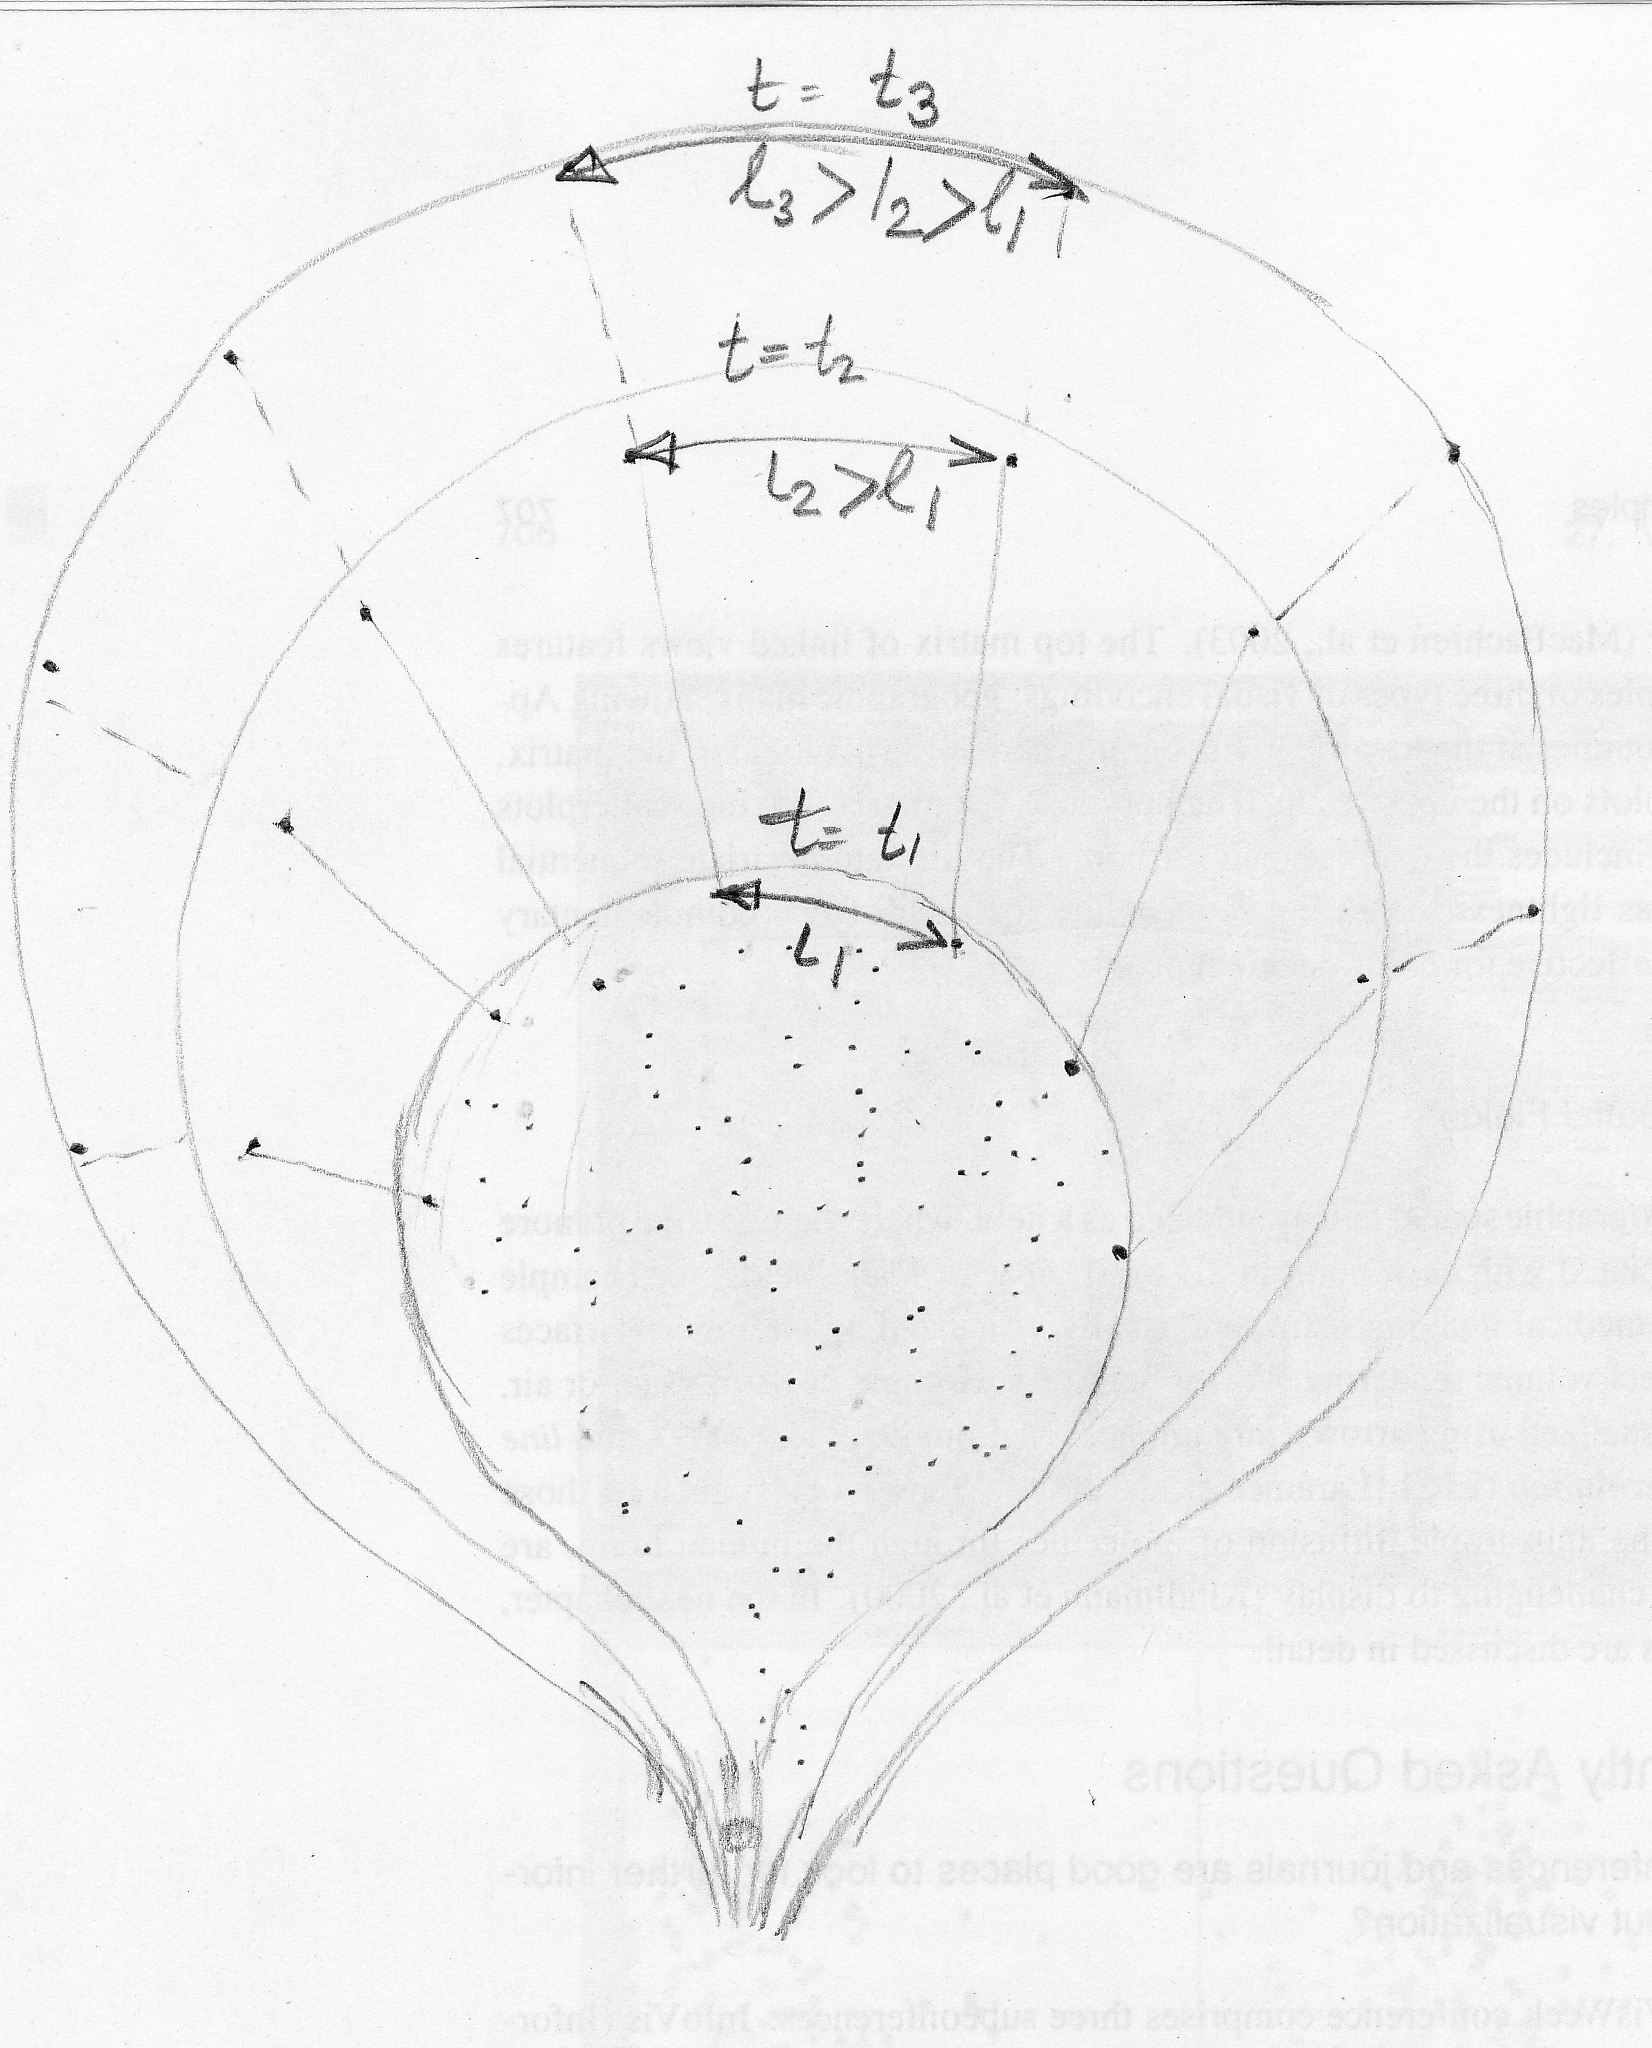
Here is our second attempt:
New Mapping
Again, the problem is to show the diaspora process while maintaining as many associations as possible.
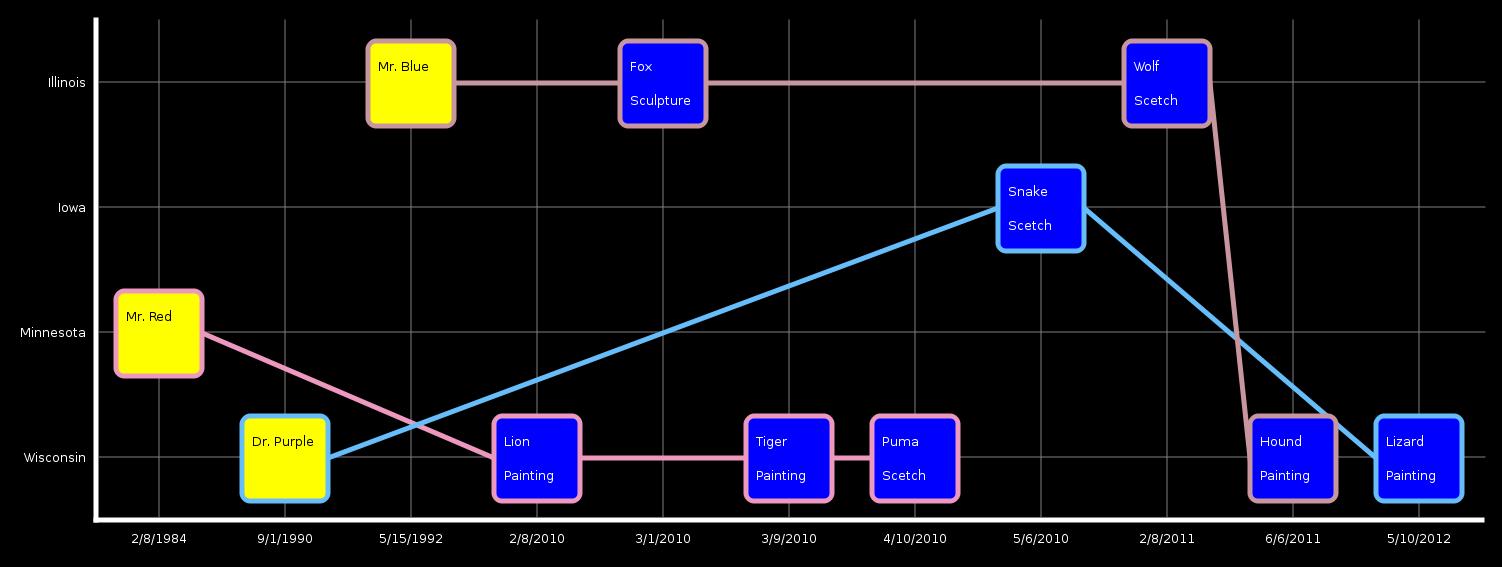
We abstracted the Date of Birth and Date of Creation into just a date concept which is encoded as position along the x axis. The Place of Creation and Place of Birth are combined into one concept that is encoded as position along the y axis. These were chosen because diaspora’s main concept is changing regions over time. The painter is encoded using his birth date and country to place him on the chart. Painters are encoded using the color yellow. Paintings are encoded using the date of creation and country of creation to place each on the chart. Each painting also displays its form to help with association. Painters are associate to their paintings using a personal timeline that is color coded for each painter.
This was implemented in C++ using the QT libraries to create the graphics. Again, a fabricated data set was created to show example output at a reasonable scale.
Did we make things better?
We believe that this is also an improvement over the original. Visualizing the process of dispora is accomplished by the deviation of each painting form the line that the original painter falls on. Association can easily be made between work and painter and all other information by simply reading the country and date from the chart.
thist is a
The chart above was found at the website cited above and a large version can be found by going there. This visualization falls on the InfoVis/Present side of the two perspectives covered in class and attempts to show the relation ship between income and income tax payed by different brackets of the population. The chart would be of interest to any member of the united states curious about who pays what percent of income tax. The chart contains both quantitative and ordered data. The quantitative data includes income size and percentage of taxable income. The ordered data includes income levels and percent income tax paid. I consider percent income tax paid to be ordered data because while the percentages could be considered quantitative, they are displayed in the context of a pie chart in which the size is used to create an ordering.
Tasks enabled include
- Determining what percentage of the population falls into a certain tax bracket.
- Determining what percentage of income in each tax bracket is considered taxable.
- Determining relative sizes of different tax brackets
- Determining how much total income tax is payed by each tax bracket.
Income size is encoded with plain text for each tax bracket. Percentage of taxable income is also encoded with text but also with a horizontal bar that is shaded with hash marks over the required percentage. Income levels are encoded using different shades of the color green with lighter being the lowest and higher being the darkest. The size of the tax brackets is encoded in the height of the green blocks as well as percentages to the size of the blocks. The percent income paid is encoded in a pie chart to the right of the income block along with text in each piece giving an exact value and shading that reflects the green counterpart. Connections are made between each income block and its percent of total income tax with lines that do not intersect.
Ordering of the tax brackets is done using both position and lightness. The highest earners are at the top and the lowest are at the bottom with the bottom being the lightest and the top being the darkest. According to Munzner, position is the best encoding for all data types, for ordered data, lightness is the second best encoding. The second best encoding for quantitative data is length which is used for percent of taxable income, and to some extent percent of income tax paid. Area is used extensively in both the table and the pie chart. While this is not one of the best encodings for any of the data types, it does allow the viewer to relate the sizes of two datum.
This visualization makes if very easy to answer the question “what percent of total tax income comes from what tax bracket.” It is clear that even though only 1.8% of the income of the highest tax bracket is taxable, that bracket still pays the majority of income tax collected. This is very important because saying that only 1.8% of income is taxable for those making more than $500,000 per year could be very misleading.
This is also a good example of removing chart junk. There are no tidbits of information cluttering the valuable information. There is a proper title and narrative at the top and a signature at the bottom. The rest is information relevant to the visualization.