
Video Mechanics: How to Make Video For Class
Design Exercise 7-1: Interaction requires you to submit a video. This posting will give you some ideas on the mechanics of how to do it: how to actually record, upload and embed it into Canvas.
The important part of making a video is planning it and getting the content right.
In order to submit a video, you need to make a video (record it and probably edit it), upload it to some place where it can be played, and then embed it into a page in Canvas. There are many ways to do this. We recommend:
- Use Kaltura Capture to record your video. This has the advantage that it will record both your camera and your screen at the same time so you can edit them together. It will also automatically upload to Katura.
- Use MediaSpace (the Univerity’s Kaltura site) to host your videos. This has the advantage that it works nicely with Canvas.
- Embed your media into Canvas using the embed my media button.
You are welcome to use other tools - as long as you can figure out how to embed your videos into the Canvas survey pages.
Note: MediaSpace is the University’s Kaltura site. Kaltura is a video hosting system (kindof like an open-source YouTube).
Kaltura Capture
Kaltura Capture is the “official University supported solution”. It lets you record screen and camera and upload it to Kaltura (the university video sharing platform). It does allow you to upload both screen and camera (and audio) simultaneously.
Finding it is tricky!
- open Mediaspace
- Click “Add New” (top menu), Kaltura Capture
- Hidden at the bottom is a link “Download for Windows” and “Download for Mac” (pick one - if you’re on Linux, you’re out of luck)
- The first time it runs, it requires a lot of permissions (since it needs to access the screen for recording)
- Once it is installed, you can create a new recording by using the “Add New” button in MediaSpace (Kaltura). The web browser opens Kaltura Capture (and logs it in so it can upload).
Kaltura capture records the video as two separate streams (there are two video files) so you can load them into a multi-track editor (if you know how to do that). If you simply upload both streams together (using the button in Kaltura Capture) the Kaltura player will automatically do picture in picture.
Kaltura has an online editor - but it is terrible (IMHO). As an experiment I spent a little time vibe coding a “video mixer” that helps you assemble the pairs of videos into a single stream. It lets you switch between videos and picture-in-picture, trim off the ends, and export to a new video. This was mainly me learning to use Google Anti-Gravity. But I think it might actually be useful for making the short videos you need for class. Don’t have high expectations - it’s two hours of me learning how to vibe code.
Kaltura MediaSpace
The best way to deliver your videos is to store them on a video platform. You could put it on YouTube, but I recommend you use the University’s site: MediaSpace because it is integrated with Canvas.
After you log into MediaSpace you can upload videos. You need to make them public so that other people (like course staff) can watch them.
Embed into Canvas
Do not upload big video files into Canvas.
In the canvas content editor, there are buttons to embed content from Mediaspace. On the Canvas editor there is a “Kaltura” button (it looks like a colorful asterisk). You can also embed YouTube.
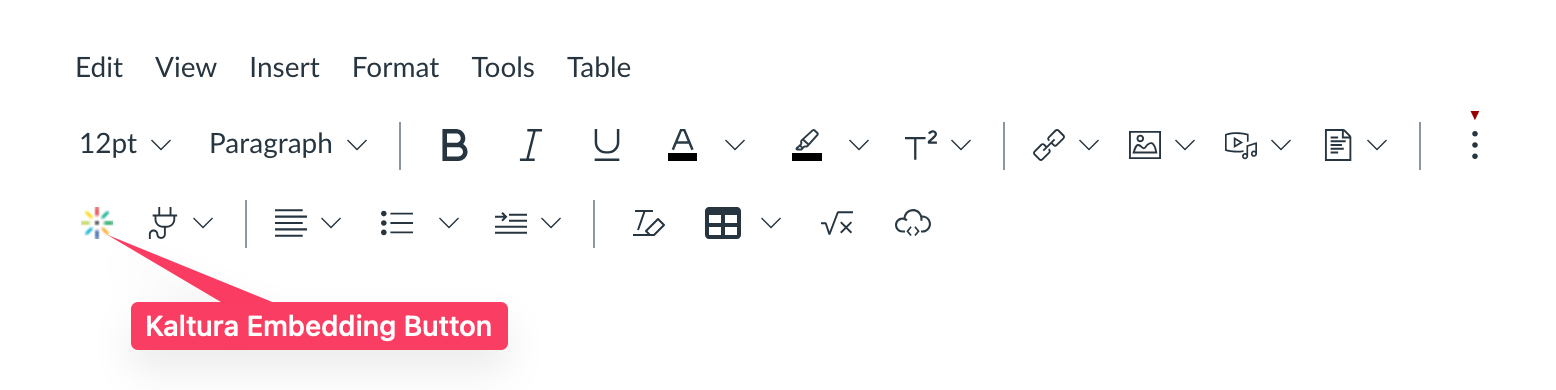
The Kaltura embedding button is a colorful asterisk. It might be hidden until you press the three dots.
Alternatives
You don’t have to use these tools.
You can use the screen and camera capture tools that are “built in” on most platforms. The built-in Screen Recorder on a Mac is easy. On Windows, there is a built in screen recorder on the “Game Bar”. I don’t have a modern Windows computer, so I haven’t tried this. The down side of these: you can’t get both the screen and the camera.
There are lots of fancier tools. Camtasia a high-end tool that is my favorite. It does high quality captures and has an excellent editor. It is specifically designed for making “simple” videos - and has the right balance of the power and flexibility of general video editing tools, and a simplified interfaces targeted at the use case we have. The University has a license (see this page) and most grad students should have access. You can get it at the Campus Software Library. However, the license is for specific usages. I’ll let you decide if doing assignments for class qualifies.